Showing posts with label demo. Show all posts

Wednesday, 12 October 2016

Future City: Update 7 - Building a Better Skyscraper

Sorry for the late post, a few mad things going on at the moment.  One of which was the Rocketjump event in Bournemouth which @dannyt of @Moov2 invited me to, to showcase Apparance.  A lovely little event with some great speakers and games to see, where I got to show Apparance to a few more people.

Skyscrapers

Last week I decided that the stand-in skyscrapers were too dull and not nearly futuristic enough.
Temporary, non-futuristic, skyscrapers.
I was looking for things like these:
The sort of futuristic skyscrapers I was after
(Sources: source 1, source 2, source 3, source 4)

Spaceships

I knew I wanted interesting angular surfaces and chamfering so as a starting point I imported some old hull surface triangulation procedures I made for my spaceship construction experiments.
Ship hull built by connecting triangulated pieces.
The premise behind these is that we can build up large and interesting building hulls out of simpler parts that connect rectangular and angled edges together.  However we also want to make sure we can use shapes that map well to the frame construct used to model within.  Rectangular sections are easy, and right-angled triangles aren't too much of a stretch either.  In most of the cases I wanted these were sufficient to build interesting shapes.
Hull triangulation procedures

Cross Section

To limit the complexity of the models built I decided a cross-sectional form where each side can be in-set and corners chamfered independently would still provide sufficient flexibility to give interesting models.
Example of a skyscraper cross-section (two matching chamfered corners and an inset side)
This information is passed around encoded in Vector3's (like the connectivity information), one for each side, defined as follows:
Side inset/chamfer encoding for skyscraper cross-sections.
This will be used to describe the outline of the building at various elevations, with hull triangulation providing us with frames to build the surface geometry to fit.  The cross section will be mutated at random along the way to make the shape change and evolve as the evaluation proceeds skywards.  The changes we can make are:
  1. Leave it the same - a straight vertical sided section
  2. Chamfer any un-chamfered corners - introduce triangular sections.
  3. Inset un-chamfered sides - introduce slopes and overhangs.
  4. Remove any chamfered corners - return to square corners.
These can be applied in various combinations and quantities, some examples shown here:
Example cross-section mutations
The requirement for this building section triangulation exceeded the original hull construction primitives so I created a new one specifically for this, based on the various techniques employed before.
Diagnostics display for building section surface triangulation

Building It Up

By iteratively segmenting the skyscrapers into sections, potentially mutating the cross-section at each intersection we get all sorts of building shapes.
Example skyscraper shapes

Surface Noise

Initially I filled in the surface spaces with the general purpose smooth gradient rectangle and triangle procedures I had to hand.  These however had consistency problems at their edges.  Even though the sub-division they perform to add detail does maintain coherency internally between new triangles and rectangles, there was no way to maintain this between adjacent instances of the procedures.
Incoherent detailing, particularly noticeable on triangular sections.
A change of approach was needed to fix this; instead of choosing corner variations at random and then using midpoint noise to sub-divide, a simpler approach is turns out is to use the 3D noise distortion algorithm I was already using for landscape and wobbly building experiments.
Experiments with 3D noise mesh distortion
Adding an operator to do single samples in space for this allowed me to use the output to modulate the surface detail.  This had the advantage that the noise function was based in world space and so any two evaluations that happened to be at a coincident vertex, and hence the same position in space, would result in the same modulation effect.  This produced the effect I was after and improved the look of the buildings no-end.
Moving from a mid-point algorithm to world-space noise algorithm for surface detail sub-division.

Roof

A quick triangulation hack later and I had the geometry to cap off the buildings too.
Temporary roof tops for the skyscrapers
I will re-visit this later as it will be great to add intermediate roof pieces between building sections so we get stepped in parts and mid-level terracing.  This complicates the roof calculation though as we need to in-fill between two cross-sections, as well as potentially generating railing frames around the perimeters too.

Windows

For some extra finesse I also knocked up a 'window' filler for the rectangular sections, giving a much better sense of scale as you 'walk' around them. Oh, and I've been playing with grass for the plaza areas that break up the city space a bit.  Some level of success was obtained, more work to do on that though ;)
Simple surface window detail increases sense of scale

The City

These new buildings, with a bit more tweaking and polish give a very pleasing look to the business district and are far more in-keeping with the direction I was intending the city to go.

Business District, now with added futuristicness
Design choices can alternate up through sections
Bigger and better business buildings


Monday, 5 September 2016

Future City: Update 3 - Blocks & Detail

Blocking Out

After digging down through the zones and district types, we have some large city regions set out.  We now want to break them down into city blocks so that we can start looking at where buildings will go.
The process is similar to the zone sub-division and uses most of the same process and procedures, but this time the design constants are dependent on the district type.  For example: residential and leisure areas are probably in smaller blocks than industrial and space-port blocks, with business somewhere in the middle.  We can experiment with other differences later on, say, favouring longer thinner leisure areas for parks or squarer business areas suitable for skyscrapers.
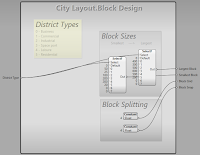
Block design constants, parameterised by district type

Whitebox

For testing purposes I added a simple cuboid as a placeholder building to each block.
Simple white-box building added to each block for test purposes
This is just a proportion of block size for now, with the height chosen randomly.  In reality a block may eventually have multiple buildings, but for now I just wanted to get a feel for how the city would look and investigate the detail levels at different distances.
View across 'white-box city'

Detail

Apparance is built around the premise of bands of detail extending out from the viewpoint, each higher detail one built based on re-synthesising the lower detail procedures.  As we start to build more detail into the city we need to begin setting up the integration with the detail management in the engine.  Since each re-synthesis is performed using sub-procedures with exactly the same input parameters, something else must provide the ability to change their behaviour as different detail results are required.
Re-synthesis of procedures for successive depths in the detail hierarchy.  How do they know what detail level to generate?
As the scene is progressively refined to give more detail, the blocks the world is divided up into get smaller.  It is this that a procedure can check to decide what level of detail to generate itself at.
For our city blocks we will switch between an extremely low detail (flat) rendition for far in the distance, to our normal block procedure as their size decreases.  This will have the effect of gradually populating the area with more buildings as we get closer.
Switching out the blocks in the distance for a simpler representation.
The normal blocks intercepted and replaced depending on our detail hierarchy block size.
The Distant Content procedure we are using will make use of a common modelling primitive; a rectangular patch with automatic detail improvement.  This also uses this detail switching to break down and subdivide its surface into smaller pieces to add detail and reveal intricacy as you view mode closely.  Here we see an example of it increasing in detail.
Successive refinements of a generic rectangular patch, introducing more detail and some variation.
Putting this all together and we get a rather satisfying reveal of detail as we move across the city.
Detail transitions and reveal testing across white-box city

Diagnostics

Setting up the detail management in a scene is quite tricky at the moment.  I am still exploring how it can best work and what can be done to improve the user experience.  To help understand what the engine and your procedures are doing a lot of diagnostics displays options are available.
Various diagnostics settings and statistics for a view-port and scene rendering.
These have been added gradually during the development of the engine and this week I've had to revisit them and add a few features to help fix problems with the detail tracking and blending system.  These features are going to be essential in debugging procedures and understanding what the engine is doing with them so it's worth having a look at them now.

Display Modes

There are several colourising modes to visualise various mesh rendering information.
Colourising of meshes to visualise state and show information spatially
The scene node hierarchy can be visualised; a progression of hues used to colour each depth level.
Visualisation of the scene node hierarchy, coloured by depth
The detail range bands and various transition boundaries can be shown to check where the blends are supposed to be happening.
Visualisation of the detail tier ranges, coloured by depth

Focusing

Most of these displays, as well as models and meshes can be selectively singled out using sliders to help close in on specific issues in the scene.  For example, information about, a particular model, in a particular node, in a particular tier of the scene hierarchy can be viewed:
Focusing in on a specific model in the hierarchy
Looking at the node diagnostics panel, we see that this model can't be refined any further because the procedures don't have any sub-procedures small enough to fit in the next scene node size down.
This model in this node can't be subdivided, so no more detail can be generated in this area.
For more information about the procedures in question and how the analysis for resynthesis worked out we can trigger a re-synthesis and analysis of a model which also allows us to see the evaluation tree (via an external GraphViz step).
Here we see the refinement capture analysis failing at our temporary content procedure.
Here it is clear that all the leaf procedures are un-refinable and need more work (which we knew as this is a test procedure of limited ability).

Debug Camera

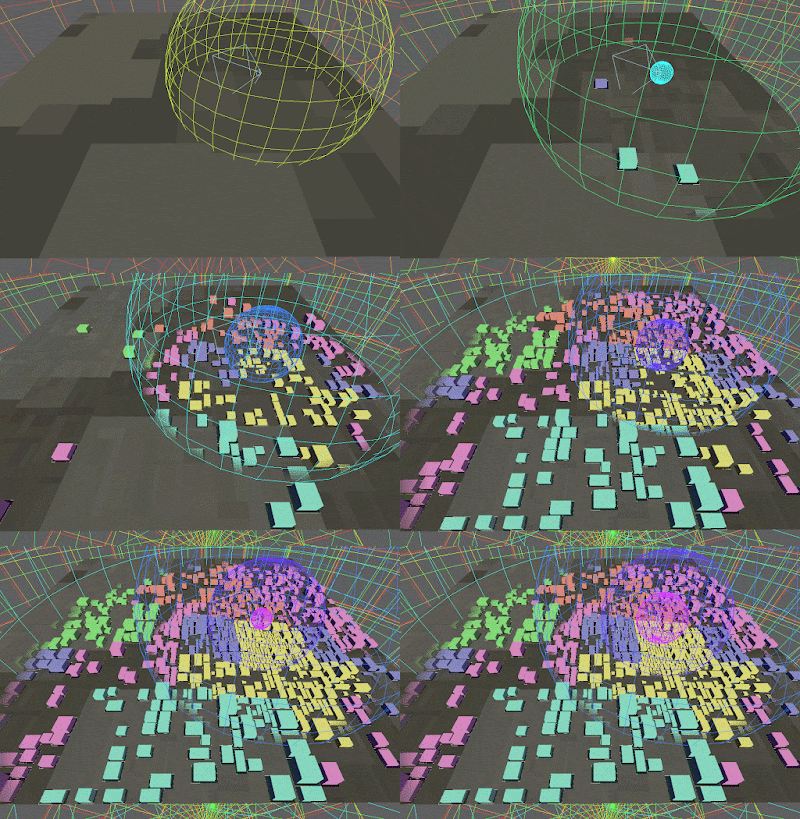
Using the debug camera and some of these diagnostics overlays we can see the detail reveal effect 'from the outside'.  Here the details is added and revealed around the view-port after a scene reset.  As progressively more detailed versions of the scene are synthesised we can see the extent of each expanding.
Detail regeneration and reveal after scene reset as seen from external debug camera position.

Next

These recent posts have been fairly dry and focusing on dividing up spaces rather than the more interesting process of filling them with things.  We will start seeing some more exciting things soon, I promise :)

Monday, 29 August 2016

Future City: Update 2 - Get Yourself Connected

This time we look at creating interesting boundaries and useful connectivity information between all our city zones.
We want a city with interesting connectivity between zones

Connections

It is as much the interconnections as the spaces in an environment that make a place interesting. Now the zones are laid out we need to look at how they are connected. As we have a number of limitations in how we implement this I'm going to use a fairly basic connection model similar to one I have used before which was based on having a single connection pathway between adjacent areas, like each side of a room having at most one door. The algorithm had the following rules (expressed in terms of rooms and doors):
  1. For your starting 'room', specify a door on each side (as desired).
  2. Decide where to split based on door positions (i.e. don't split down a doorway).
  3. When you split an area into two, always add a door into the new wall.
  4. Recurse (go-to step 2) for both sides.
This produces a map where all the four outer doors are guaranteed to be connected, and you can reach every generated room.
Previous connectivity test, all rooms remain connected, various in-fill rooms.

When is a door not a door?

For our city, the door/wall terminology is going to be used to mean something slightly different:
  1. A door corresponds to a region of free travel between areas, be it pedestrian, or vehicular.  This can mean either both sharing the same flat height level at the boundary, or that they both guarantee to match some underlying landscape shape at the boundary.
  2. A wall corresponds to a barrier between areas, this can take several forms and may or may not have some sort of minimum barrier height.  This could be a wall, fence, steep drop, ditch, or just allow the back of a building to sit along that edge.
Barrier 'wall' (red) and open 'door' (green) segments along the side of an area.
This has an important effect on the splitting constraints; in that I want to allow splitting the open part in two by a boundary.  This will introduce more interesting topologies and should create greater connectivity than the 'single path to exit' algorithm above.
Splitting the area in two but with splitting of an opening allowed.
This does come at a cost though as the calculations needed to maintain connectivity are in-fact more complicated.  I decided to try and track access back to the four starting sides more thoroughly this time so that when splitting, we can work out if we have the option not to add a door, again increasing the connection graph variety.
Also, remember, we are splitting the city up into zones at the moment, these are fairly high-level, and quite large.  The blocked boundaries aren't going to be massive long walls, but opportunities for the next stages of subdivision to use them in different ways to partition the city up into lots of interesting spaces.  Similarly, a long gap may not imply a continuous connection, only that there be some form of connection along the length of each area.  Different areas may decide to achieve this in different ways, be-it steps, a ramp, a wall with an archway, and so-on.

No Structures

A quick aside about structure support in Apparance.  At the moment there are only a handful of fundamental data types you can pass around.  It is feasible to support arbitrary collections of these wrapped up into custom data types (structures) that can be passed around together more easily using single connection points and wires.  This would make propagating things like the access parameters and connectivity information much, much easier and also allow us to modify and add to this information without the huge amount of rewiring it would otherwise need.  Unfortunately, as it stands, I can stretch what I have and make a few design compromises enough that proper structure support isn't enough of a priority.  Something I have mused over a lot, definitely elegantly implementable, and definitely a future feature.  For now though we will pack out information into existing types.

To door or not to door?

Access

The presence of an opening in an side is represented by two horizontal values, the position of the left edge and the position of the right edge.  The absence of an opening is represented by either it's left edge being past the right end of the side, or the right edge bring past the left end of the side.
Opening specified by position of left and right ends.  Fully blocked side specified by either both at the right end of the wall or both at the left end of the wall.
To pass this information around we'll pack it into a Vector3, one of the fundamental types that is used to represent a 3D vector.  It has three floating point values X, Y, and Z of which we use X and Y to be the left and right edges of the opening.  The Z value isn't used yet, but will be needed when we want to encode some height information into the opening.
Packing of edge connectivity into a Vector3
Each area (or room) consists of four sides, each potentially accessible via openings, and so we need to track and pass around four of these Vector3 access values.  As a convention, these are referred to as West, East, South, and North (or their initial), and in that order (lower X axis, upper X axis, lower Y axis, upper Y axis).
West, East, South, and North sides of an area.

Connectivity

We also need to track connectivity available via each side of an area as we sub-divide.  Since we only need to track whether we can reach each of the four outer sides when we only need four bool values, or four bits of data.  This is much simpler information and rather than passing round a value for each side we can pack the information needed into a single integer as a bit-field.
How we pack information about which side of our area can provide access to which side of the city into a 32 bit integer.  A bit value of '1' means yes, we can get to it, and '0' means no we can't.
We will need add a few new bit-wise operators to support the packing and unpacking logic.  These are bit shift, AND/OR, and maybe a bit test operator too.  We can then build packing/unpacking procedures from these.
Connectivity packing and unpacking procedures
NOTE: I've been playing with clearer labelling of some of the simpler operators.  They can now have either large text, or characters from the Symbol font.  This combined with blank IO names and title suppression produces some nice compact visual representations.  You'll see some more below.

Implementation

We are now ready to implement this new functionality on top of the work we did last time splitting our city into zones. To start with I factored out the splitting process into own procedure, this helps manage the complexity of the already fairly complicated procedure that decides whether we should split and which way.
The newly factored out Split procedure in place

Do the splits

New split point, side calculation, and access logic are all in their own procedure now. To make the splitting logic simpler we abstract away the orientation of the split by 'normalising' the incoming area information and then 'de-normalising' it back afterwards.  This allows us to implement the split logic once and be able to use it for both horizontal and vertical splits.  The four sides are termed Left, Right, Bottom, and Top instead of the W.E.S.N. directions we use normally, to help distinguish normalised from de-normalised.
The split operation.  Mostly consisting of the logic to help us treat either orientation of split the same way.

Where to split

The split itself is broken into two parts, where to split, and then how to split.
First we need to work out where across the area are we going to split.  Since we are allowing splits across openings this is technically only limited by the need to ensure we don't create any area too small (min zone size design parameter).

Neat & tidy, tidy & neat

At this point it would be nice to also limit the minimum feature size we create during a split.  Since an arbitrary split could be any distance from an arbitrary opening edge then we can create very tiny openings and short walls.  It would be good to reduce this effect and we can achieve it in two ways.  One is to snap to some overall grid spacing, and second to snap to the edges of the openings in the two walls we are intersecting. The Split Point procedure handles all this for us.
Deciding on where to split the area and generating access information for either side of the split.
When splitting an area into two halves, the connectivity is going to be affected by whether there is an opening in the new wall.  To decide on this we need to work out where each new area is already connected to and use this as the potential new connectivity across the new divide.  By checking to see if each side of the divide includes the opening from the two sides being intersected and combining their connectivity with the connectivity of the opposite wall we get a connectivity value from each side of the split.

How to split

Deciding on the dimensions of an opening in the new wall is fairly straightforward.   We do however need to check whether we need to force an opening though to maintain connectivity between the city outer walls.
Side splitting and connectivity update.

Results

This update was implemented in two stages, first the access generation (wall/door) for each area, then the connectivity calculation and sub-division side opening decision making.  Here is an example where you can clearly see areas that end up disconnected from each other due to no connectivity management.
Disconnected regions (highlighted) present before connectivity checks were implemented
Once the connectivity system was in place it all started working properly.  Here is a selection of city zone layouts with connectivity information diagnostics display enabled.
Examples of a fully connected city

Next

Next we will start breaking down each of our zones into city blocks.  The process is similar to before, but each district type may have different requirements as the layout of each should differ to keep things interesting.
We will also starting thinking about where significant buildings are going to be placed since we will soon require a skyline silhouette to appear as we approach the lower detail end of our city.  Development is a process of adding detail, top-down, exactly analogous to approaching the city gradually from a distance.  Think about what you expect to see, and when.

Sunday, 21 August 2016

Future City: Update 1 - Divide And Conquer

Top Down

A key consequence of the Apparance detail management system is that each stage of refinement must be possible independently from any other.  The upshot of this is that the content within a block (in a particular tier) must only depend on the content of its parent (higher tier) block.  It can't depend on the content of any neighbouring blocks.  If this were allowed, then you introduce many cases where long chain dependencies and circular dependencies occur causing no end of problems.  It is also easy to see that approaching a block from one direction leads to neighbouring blocks being refined in a different order to approaching from another direction, again causing problems if you depend on them.
Vertical (downwards) dependency = Good :)
Horizontal (sibling) dependency = Bad :(
Circular dependency = Really Bad :( :(

The Price We Pay

For a lot of structures and models we may want to build, this constraint isn't a problem. For example, refining a wall into individual bricks is straightforward as the bricks and their positions can be generated deterministically from the more general wall shape representation above.  There are however many cases where we cannot model in this way, for example; building a dungeon of interconnected rooms and corridors.  Many procedural dungeon generators are effectively image processing systems, applying several passes to the dungeon 'image' (cells or otherwise) to build up, interconnect, and validate the space.  This is illustrated well in this nice dungeon generation write-up.  Since Apparance doesn't have any image processing (yet) with which to drive this sort of generation, and is effectively a purely functional programming system, we have to use the sub-division approach and work out how to circumvent the horizontal inter-dependencies we meet when neighbouring rooms need to be connected.  More on this later/next time.

City Size

As an initial starting point I think a 10 km x 10 km* city is a good mixture of being both an impressive size and suitable technology show-case.  Since we are always sub-dividing, we also need to start with an outer frame for the city that is big enough to house the tallest building we want.  To put this another way; setting the starting height of the city frame defines what the maximum height a building can be.  (It's a mindset that we need to really get into to).  A height of 200 m* is a good starting point; here's what it looks like:
Bounds of our 10 km x 10 km x 200 m city
*The engine is generally unit agnostic but I am going to stick to 1 Unit = 1 m for sanity's sake.

Space Filling

As stated previously, we are limited to rectangular sub-division of the city at the moment so it will all be a bit angular, but hopefully arbitrary splitting and plenty of adjacent zones with the same type will create interesting shapes none-the-less.
An algorithm I've used before to divide up a rectangular area is as follows:
  1. If too small to subdivide, instance a zone and return.
  2. If we aren't forced to subdivide (because we are too big), optionally instance a zone and return.
  3. If we are too small in one direction then subdivide in the other direction, otherwise choose a direction.
  4. Choose a split point such that no sub-regions are too small to instance.
  5. Split into two parts and recurse into each part in turn.
This works well and was basically what was used in some early dungeon generation experiments.
Here is this algorithm implemented as a procedure in the Apparance Editor:
Recursive city zone subdivision procedure
This one is mostly fundamental operators (grey block), but the three white blocks are procedures; 'Content' is where we instance a zone, and the 'Zones' procedures are instances of the procedure itself and where the recursion happens.  There are two, one for each side of the split point.  It's a fairly complex procedure as they go, so if you have specific questions about it let me know in the comments below.  The longer lines crossing over behind other operators make it a bit messy but I have ideas about how this UI could be improved (another story).
Setting up the content procedure to just render a randomly coloured inside-out box and choosing suitable minimum and maximum zone sizes gives us a nice visualisation of the resulting zone layout.
City zone procedure output. Zone sizes from 500m to 2,500m.

City Structure

To model an interesting city layout I decided that some familiar planning approaches should be used.  We will start with some basic city district types and a mechanism for loosely specifying where they should be located in the overall city.  This can then be used to drive the classification of each zone as we divide up the city.
  • 1 business zone (offices, skyscrapers)
  • 1 commercial zone (shops, restaurants, tourist attractions)
  • 1 industrial zone (chimneys, factories, and storage facilities)
  • 1 space port zone (space ship docking and handling)
  • Leisure zones (parks, monuments, and recreation areas)
  • Residential zones (housing)
The last two are to be used to in-fill the remainder of the map and don't have any specific location.
Zones are going to form the highest level of city structure, and eventually each one will have many buildings and areas within it (probably called 'blocks', like city blocks).  For now, we are laying out the general plan.

Zone Distribution

For each instanced zone, we need to weigh up the various factors that affect what it could be:
  1. Distance from each district centre.
  2. Size of each district.
  3. Weightings of the non-centralised district types.
  4. A random factor to introduce variation and avoid clean district boundaries.
This is embodied in the following procedure:
Main zone type calculation procedure
Here, we use the zones location (centre point) to calculate weightings for the four centralised districts and then perform a weighted selection between them to generate a zone type (an index, 0 to 5).  We'll dig into each of these in turn:

Design Parameters

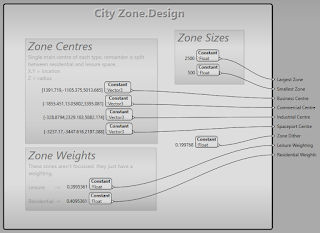
I've found it useful to group design-time constants into their own procedures.  These are effectively global variables, but with the option of making them parameterised later too.  Doing this makes it easy to find major control points by just looking for procedures named 'Design' in the procedure browser when it comes to tweaking the project later on.
Zone design parameters wrapped in their own procedure
Here we have grouped the zone min/max sizing values as well as all the location, size, and weighting parameters used in zone type selection.  For convenience, I have encoded the district size in the Z value of the Vector3 as only the X and Y are needed to specify a centre.  (Structure support is on the wish-list, but a long way off).

Zone Weighting

This is a fairly simple procedure that just takes a zone location and a district definition (labelled Zone Centre & Size here) and generates a weighting value.  The convention here is that you get a weight of 1 at the centre and a weight of zero at a distance of 'Size' from the centre.  This will generate negative values outside of that but this doesn't affect the weighted selection process.
Zone weighting calculation

Distribution

The distribution process is a general one and hence the procedure was created under the 'Maths' category (for want of a better location).  This is implemented as a chain of tests to see if each weighting value should replace the previous one.
Distribution evaluation via chained tests
Several outputs feed into the next test in the chain, with the final result being available at the output of the last test.
Individual distribution test procedure
The test procedure performs a weight adjustment according to the dithering parameter, randomly offsetting the weight a little to introduce artificial successes and failures when comparing against similar weights.  This introduces an amount of overlap between the district types.  The weight is compared with the previous 'best' weight and this selects whether its own index and weight are passed on, or the previous stages index and weight.

The Results

Updating the Content procedure to colourise the zone according to district type and putting all the above procedures into action produces the following, rather satisfying, result:
City zones classified into district types
Here you can clearly see four of the colours (red, yellow, green, and cyan) are centred around specific points in the map and the other two (blue and magenta) are mixed in around them.  The dithering has been adjusted to break up the zone boundaries and we can see some impinging of the residential and leisure district types on the centralised ones.
As the procedures were constructed, any element of random choice is driven from seed values passed down through each procedure.  This means that the seed value passed into the root procedure can be changed to affect the whole city.  Here are a series of district layouts from a series of seed values:
Varying the seed to produce different cities with similar structure
Each one still has the general layout desired, but introduces interesting variations on the same theme.  Later on we can experiment with parameterising the design parameters so that the locations, sizes, and weightings of the districts themselves can change from city to city.

Next

The next step is to look at how these zones are going to be connected, what sort of interfaces there will be (free travel, steps, ramps, barriers, etc.), and how we are going to break these blocks up further and start to introduce actual buildings.