Blocking Out
After digging down
through the zones and district types, we have some large city regions set
out. We now want to break them down into
city blocks so that we can start looking at where buildings will go.
The process is
similar to the zone sub-division and uses most of the same process and
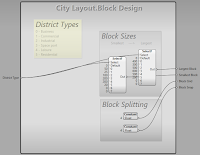
procedures, but this time the design constants are dependent on the district
type. For example: residential and
leisure areas are probably in smaller blocks than industrial and space-port
blocks, with business somewhere in the middle. We can experiment with other differences
later on, say, favouring longer thinner leisure areas for parks or squarer
business areas suitable for skyscrapers.
 |
| Block design constants, parameterised by district type |
Whitebox
For testing purposes
I added a simple cuboid as a placeholder building to each block.
 |
| Simple white-box building added to each block for test purposes |
This is just a
proportion of block size for now, with the height chosen randomly. In reality a block may eventually have
multiple buildings, but for now I just wanted to get a feel for how the city
would look and investigate the detail levels at different distances.
 |
| View across 'white-box city' |
Detail
Apparance is built
around the premise of bands of detail extending out from the viewpoint, each
higher detail one built based on re-synthesising the lower detail
procedures. As we start to build more
detail into the city we need to begin setting up the integration with the
detail management in the engine. Since
each re-synthesis is performed using sub-procedures with exactly the same input
parameters, something else must provide the ability to change their behaviour
as different detail results are required.
 |
| Re-synthesis of procedures for successive depths in the detail hierarchy. How do they know what detail level to generate? |
As the scene is progressively refined to give more detail, the blocks the world is divided up into get smaller. It is this that a procedure can check to decide what level of detail to generate itself at.
For our city blocks we will switch between an extremely low detail (flat) rendition
for far in the distance, to our normal block procedure as their size decreases. This will
have the effect of gradually populating the area with more buildings as we get closer.
 |
| Switching out the blocks in the distance for a simpler representation. The normal blocks intercepted and replaced depending on our detail hierarchy block size. |
The Distant Content procedure we are using will make use of a common modelling primitive; a rectangular patch with automatic detail
improvement. This also uses this detail switching to break down and subdivide its surface into smaller pieces to add detail and reveal intricacy as you view mode closely. Here we see an
example of it increasing in detail.
 |
| Successive refinements of a generic rectangular patch, introducing more detail and some variation. |
Putting this all
together and we get a rather satisfying reveal of detail as we move across the
city.
 |
| Detail transitions and reveal testing across white-box city |
Diagnostics
Setting up the
detail management in a scene is quite tricky at the moment. I am still exploring how it can best work and
what can be done to improve the user experience. To help understand what the engine and your
procedures are doing a lot of diagnostics displays options are available.
 |
| Various diagnostics settings and statistics for a view-port and scene rendering. |
These have been
added gradually during the development of the engine and this week I've had to
revisit them and add a few features to help fix problems with the detail
tracking and blending system. These
features are going to be essential in debugging procedures and understanding
what the engine is doing with them so it's worth having a look at them now.
Display Modes
There are several
colourising modes to visualise various mesh rendering information.
 |
| Colourising of meshes to visualise state and show information spatially |
The scene node
hierarchy can be visualised; a progression of hues used to colour each depth
level.
 |
| Visualisation of the scene node hierarchy, coloured by depth |
The detail range
bands and various transition boundaries can be shown to check where the blends
are supposed to be happening.
 |
| Visualisation of the detail tier ranges, coloured by depth |
Focusing
Most of these
displays, as well as models and meshes can be selectively singled out using
sliders to help close in on specific issues in the scene. For example, information about, a particular
model, in a particular node, in a particular tier of the scene hierarchy can be
viewed:
 |
| Focusing in on a specific model in the hierarchy |
Looking at the node diagnostics panel, we see that this model can't be refined any further because the procedures don't have any sub-procedures small enough to fit in the next scene node size down.
 |
| This model in this node can't be subdivided, so no more detail can be generated in this area. |
For more information about the procedures in question and how the analysis for resynthesis worked out we can trigger a re-synthesis and analysis of a model which also allows us to
see the evaluation tree (via an external GraphViz step).
 |
| Here we see the refinement capture analysis failing at our temporary content procedure. |
Here it is clear that all the leaf procedures are un-refinable and need more work (which we knew as this is a test procedure of limited ability).
Debug Camera
Using the debug
camera and some of these diagnostics overlays we can see the detail reveal
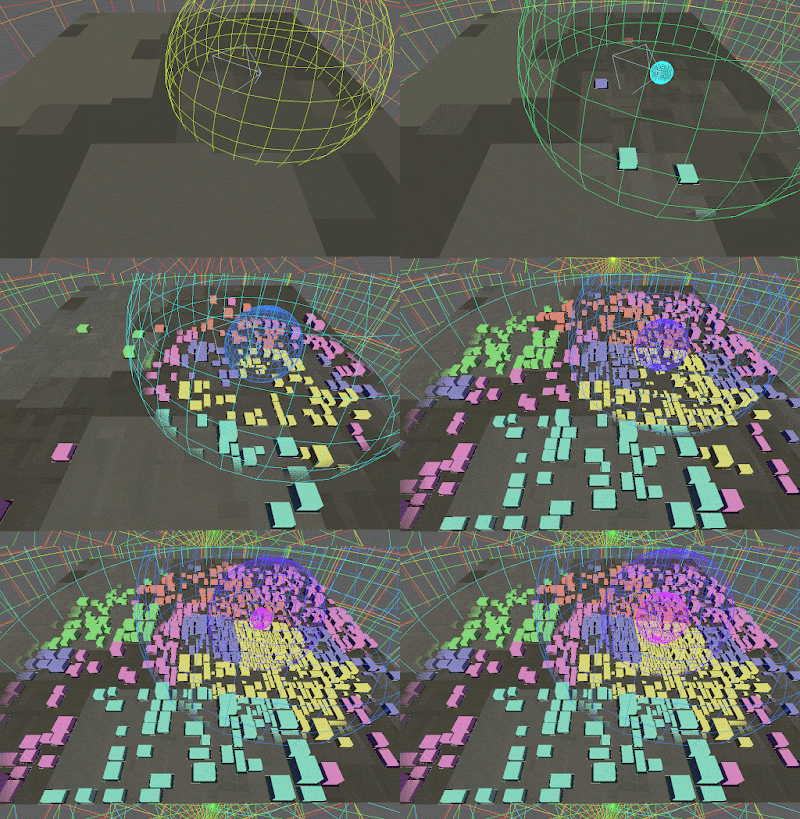
effect 'from the outside'. Here the
details is added and revealed around the view-port after a scene reset. As progressively more detailed versions of
the scene are synthesised we can see the extent of each expanding.
 |
| Detail regeneration and reveal after scene reset as seen from external debug camera position. |
Next
These recent posts
have been fairly dry and focusing on dividing up spaces rather than the more
interesting process of filling them with things. We will start seeing some more exciting
things soon, I promise :)
